Sewing the blocks
For translation: turn on subtitals; go to settings, go to subtitals, turn on Auto translate, choose your language.
The quilt is planned, the fabrics are chosen and you have cut everything accurately. You did great!
This week the blocks will be sewn from the strips. There are two different methods available to you. You probably already thought about which method you wanted to use last week. If not, go back to last week’s blog post and see which method suits your quilt.
So before I tell you about the methods, a few important notes in advance. Sometimes it happens that when sewing you don’t take the seam allowance very seriously. In this case, it is important that you adhere to this very precisely, as your block has no “wiggle room” so there is room for trimming. In addition, the stripes would be different sizes afterwards and that might look a bit unsightly in the finished quilt.
In most of my patterns, the seam allowances are ironed apart, which may seem strange to some people. But there is a good reason for this, because the result will simply be more accurate afterwards, without having to adhere to a so-called “scant ¼” seam allowance”. This seam allowance uses a very small amount less than ¼” seam allowance. This can be used for But it can be difficult for beginners and leads to poorer results. Another advantage of ironing it apart is that the quilt lies very smoothly afterwards, which makes quilting easier and is also preferred by many long-arm quilters.
Method 1
With this method you have a lot of small strips. To keep an overview, it can make sense to lay out all the blocks once and then stack them, this way you avoid unwanted patterns coming out later.
If you are a beginner, it is easiest if you sew each block individually. You have two options for this.
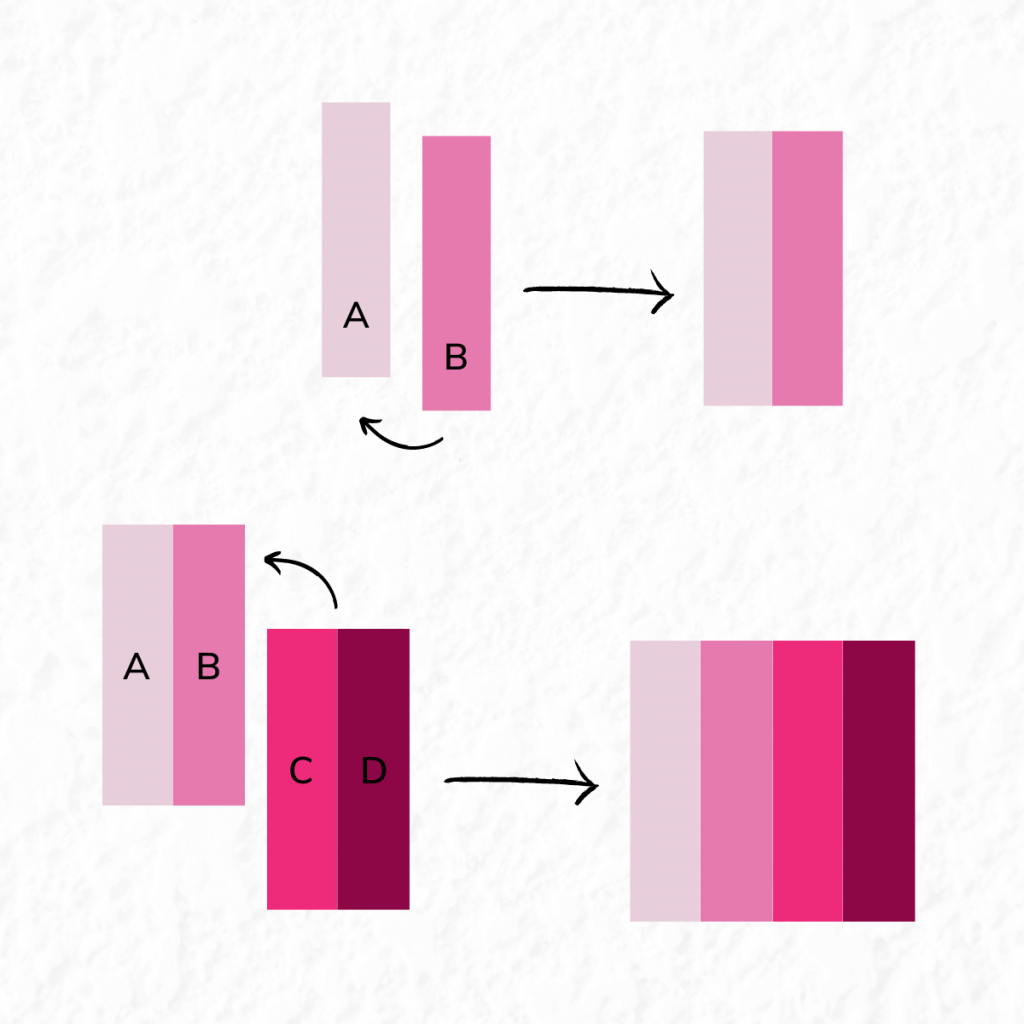
Option 1: you sew each strip together individually. It is important that you always sew your strips together in such a way that you alternately sew from top to bottom and then from bottom to top.
Option 2: You first sew a middle and an outer strip together from top to bottom. Then sew the two middle strips together from bottom to top.
If you’re having a hard time with this, I recommend this week’s video. There I explained both options to you in detail.
Method 2
With this method you work with the long jelly roll strips. Since you are sewing very long strips together, it is particularly important to alternate the direction in which you sew, otherwise your finished strips will bend a little and it will be very difficult to cut the blocks.
Here, too, you have two options for sewing your strips together. They are the same as method 1, only the strips are longer. However, it is important that you make sure that you lay all the strips on the top flush so that one side is very straight and only one side is slightly asymmetrical.
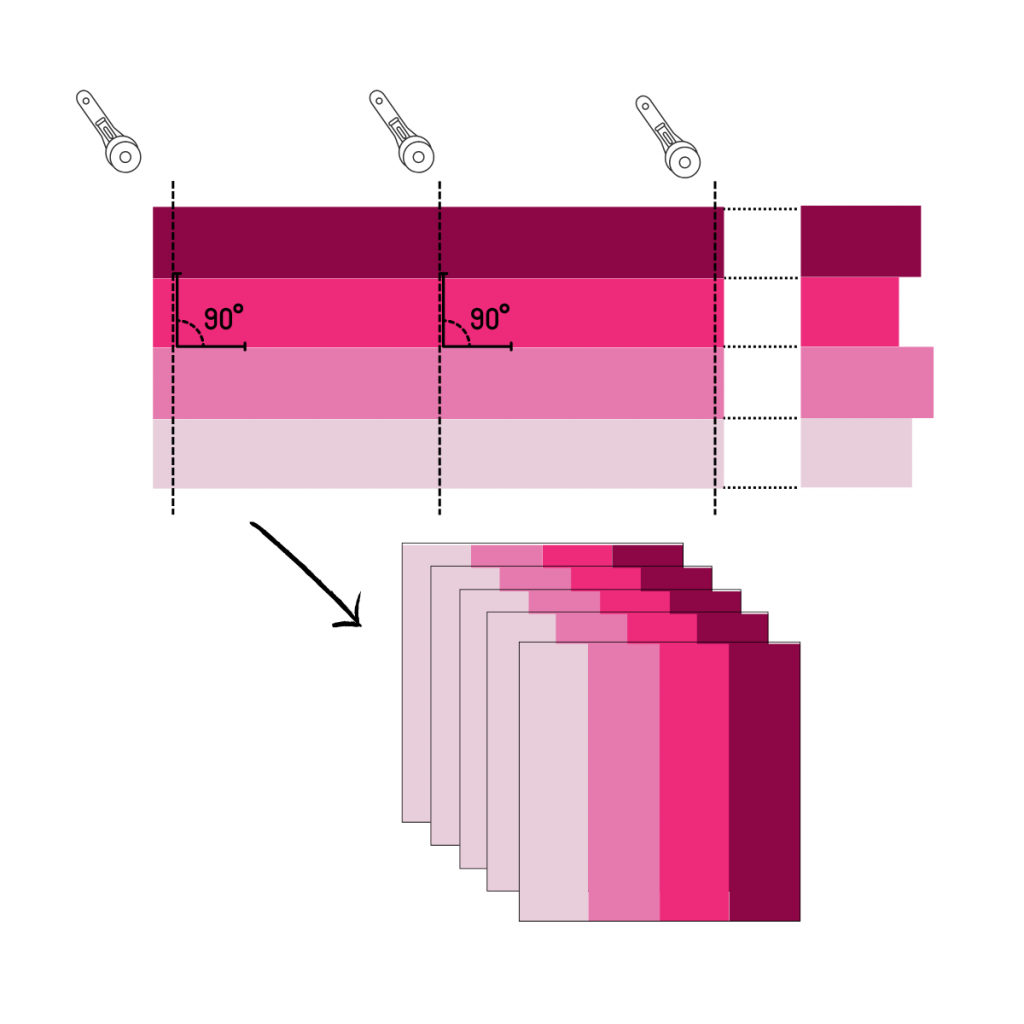
In method 2, in contrast to method 1, there is an intermediate step after sewing the strips together before the blocks are finished with their corners. The long strips do not have to be cut apart. Make sure you cut at right angles to the center seam for the most accurate result. You should also start as close to the straight end as possible.
The corner has to come off.
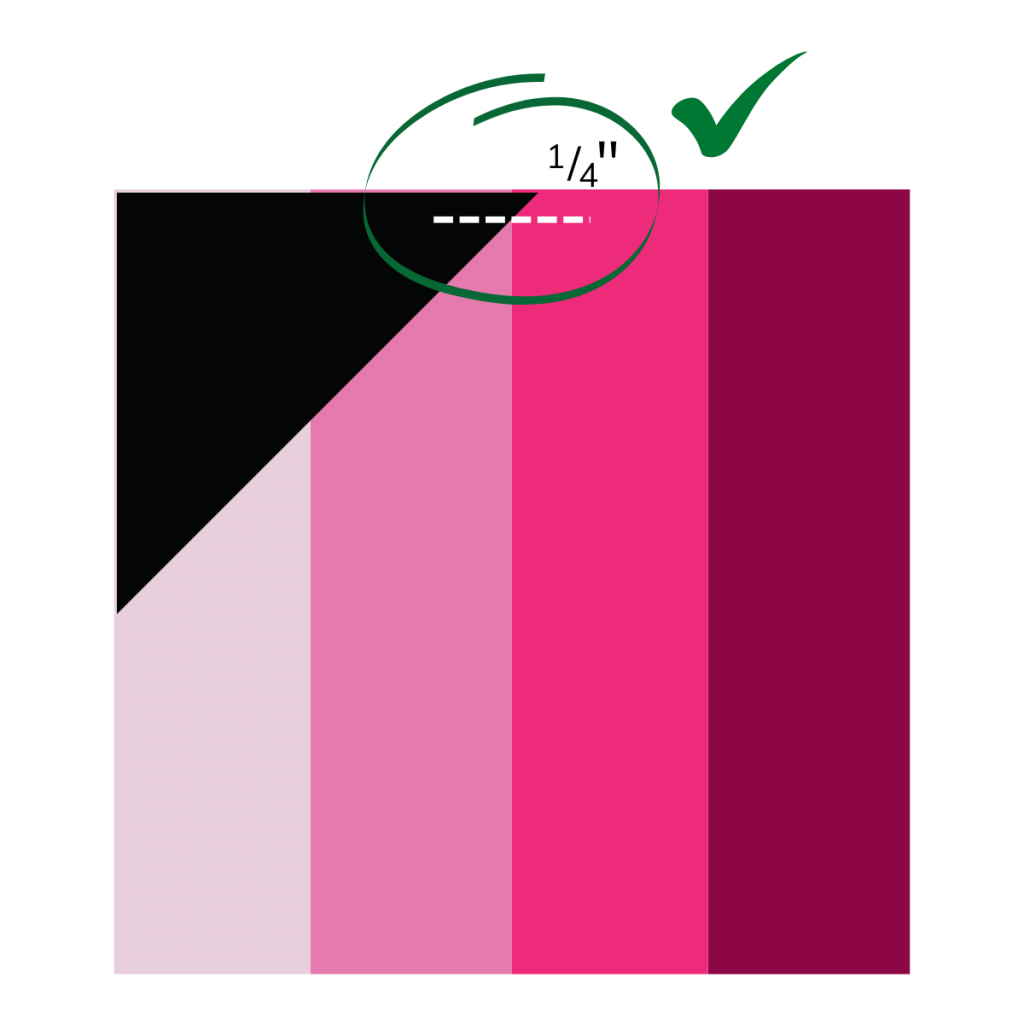
To complete the block, you now have to add a background square to one of your corners using the “SnowBall” technique. Maybe you already know the technique, if not it is described very precisely in the pattern.
Here, too, it can be worthwhile to lay out the blocks the way they should be placed in the later quilt. Then, depending on the version you choose, you can place your squares exactly on the corners where you want them to be sewn later. SO you don’t run the risk of an error creeping in. If you want to be super sure, take another photo of the quilt that has been laid out so that you can put everything back in the same way it is now in front of you.
If you end up noticing that your background color corner is slightly larger than two of the stripes, you’ve done everything right.
Happy ending
Now you have finished sewing all your blocks. Look at it, be happy and be proud of yourself. You’ve done great things.